
Restoring My College VB .Net Application - Part 1
OCR, .NET
My First Code Experience
During college, I took a computing module. It was taught by an enthusiastic man who, because of this course, has influenced my career decision to move into software and taught me to know just enough to solve the problems at hand and argue every last detail until proven wrong; so thanks, Joe. In retrospect, I probably should have made more effort with this project but the name of the game was to just pass, looking back at it now this thing was full of security flaws and was built under a flawed development model. It was great!
This code was initially developed on a rubbish laptop that sometimes turned off unexpectedly, with the entirety of development isolated from any type of version control or any type of backup. However, to submit the code to the exam folk the entire piece of work: design proposal, waterfall dev cycles, code, 143 pages of manual test evidence, had to be printed, bound and shipped off - all for that vital number telling me how clever I was (am).
This post will be dedicated to the story of how I brought it back from the **paper ** I was forced to print it out on and into the 21st century - open-source crap dumped on Github.
The First Steps
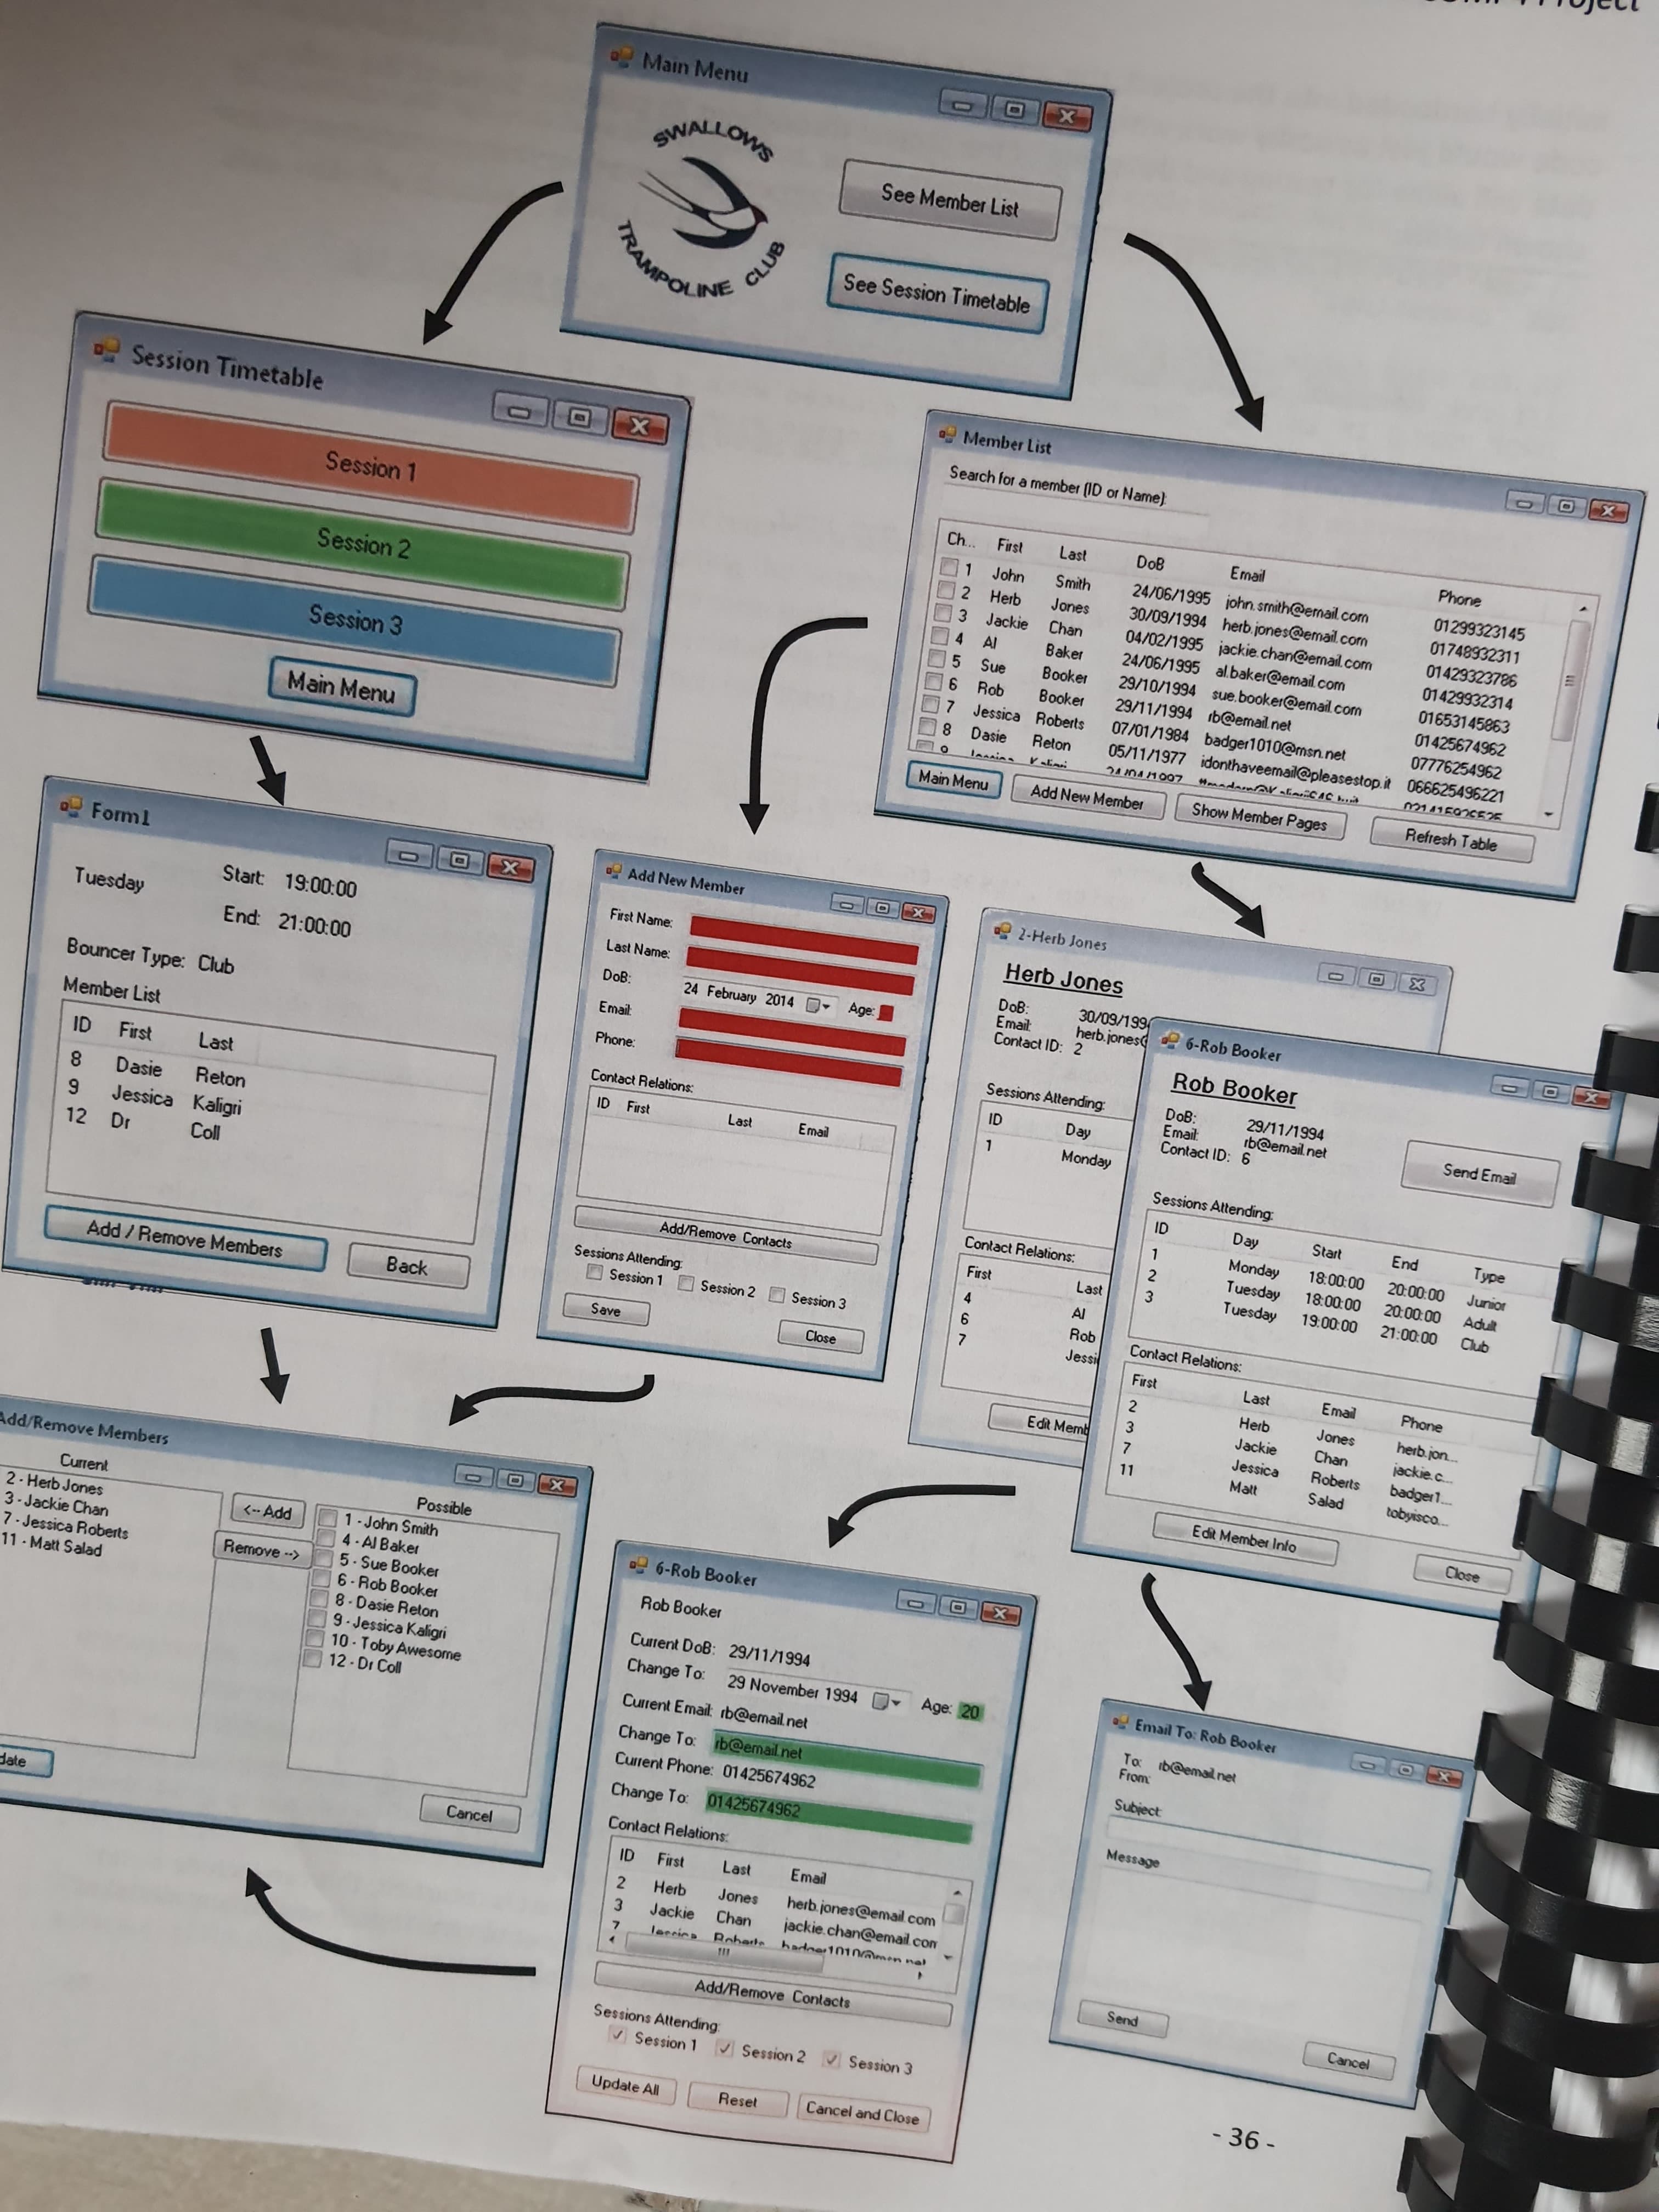
The code is on paper so I need to have the entire 74-page collection of code transcribed into actual text. From there I can look into building the class structure and finally running the app.
Pictures!
I have painstakingly photographed every page of code that's required with my phone as my data collection step. This includes all the SQL files where, for some foreshadowing reason, I picked ' chicken' for all my passwords. Security at its finest.
My favourite part of this, outside the code, is the mistakes I make but obviously not fixed (or fixed by pen, earlier in the project), like the well described "Center Number" I give in every header of the project doc. Can you tell I was destined for great things?
From here all I now need to do is turn this into a block of text I can plop into a file and run!
Image to Text work
Or Optical Character Recognition (OCR) as it's known, is the next phase. This is a boring basic part - yes I could write my own OCR and have it all generate correctly but this is not the point of this blog post (and will be left as an exercise to the reader). The real solution here is using the cloud to speed up the work. Here are the options:
- AWS Rekognition (not amazing)
- Google Drive image to text (better)
- Azure computer vision (pretty good)
- This online tool (good but manual copy-paste will suck)
Many of these require URLs of images to be provided, all the images for this project are open-sourced under the Github repo. Ultimately Azure seems to take the cake, so we will use its pretty good recognition and then tidy up after.
To analyse the images, we use the API with the below function:
1 2 3 4 5 6 7 8 9 10 11 12 13 14 15 16 17 18 19 20 21 22def make_request(img_url: str, print_res: bool = False) -> str: # Make initial request recognize_handw_results = computervision_client.read(img_url, raw=True) # Parse response to get op ID operation_location_remote = recognize_handw_results.headers["Operation-Location"] operation_id = operation_location_remote.split("/")[-1] # Await the response while remote does processing (nast impl but I dont care) while True: get_handw_text_results = computervision_client.get_read_result(operation_id) if get_handw_text_results.status not in ['notStarted', 'running']: break time.sleep(1) # Print the detected text, line by line if get_handw_text_results.status == OperationStatusCodes.succeeded: for text_result in get_handw_text_results.analyze_result.read_results: if print_res: for line in text_result.lines: print(line.text) return text_result.lines
Wrapping this for a given image is easy.
1 2 3 4 5 6 7 8 9 10 11 12 13 14 15 16 17def pipe_image_to_txt(image_file_path: str) -> (str, str): # form known url image_url = GH_BASE + image_file_path # Make request and get data res = make_request(image_url) # Join resulting data to a string out_text = "\n".join(t.text for t in res) # dump into an out file out_file_name = images[0].replace(".jpg", ".txt") with open(f"out/{out_file_name}", "w") as f: f.write(out_text) # util result return image_file_path, out_file_name
and finally, loop!
1 2 3for i, image_file_path in enumerate(images[:1]): original, test_file = pipe_image_to_txt(image_file_path) print(i,, "|", original, "->", test_file)
The result is now all pretty and gives us a nice output for where the content was dumped:

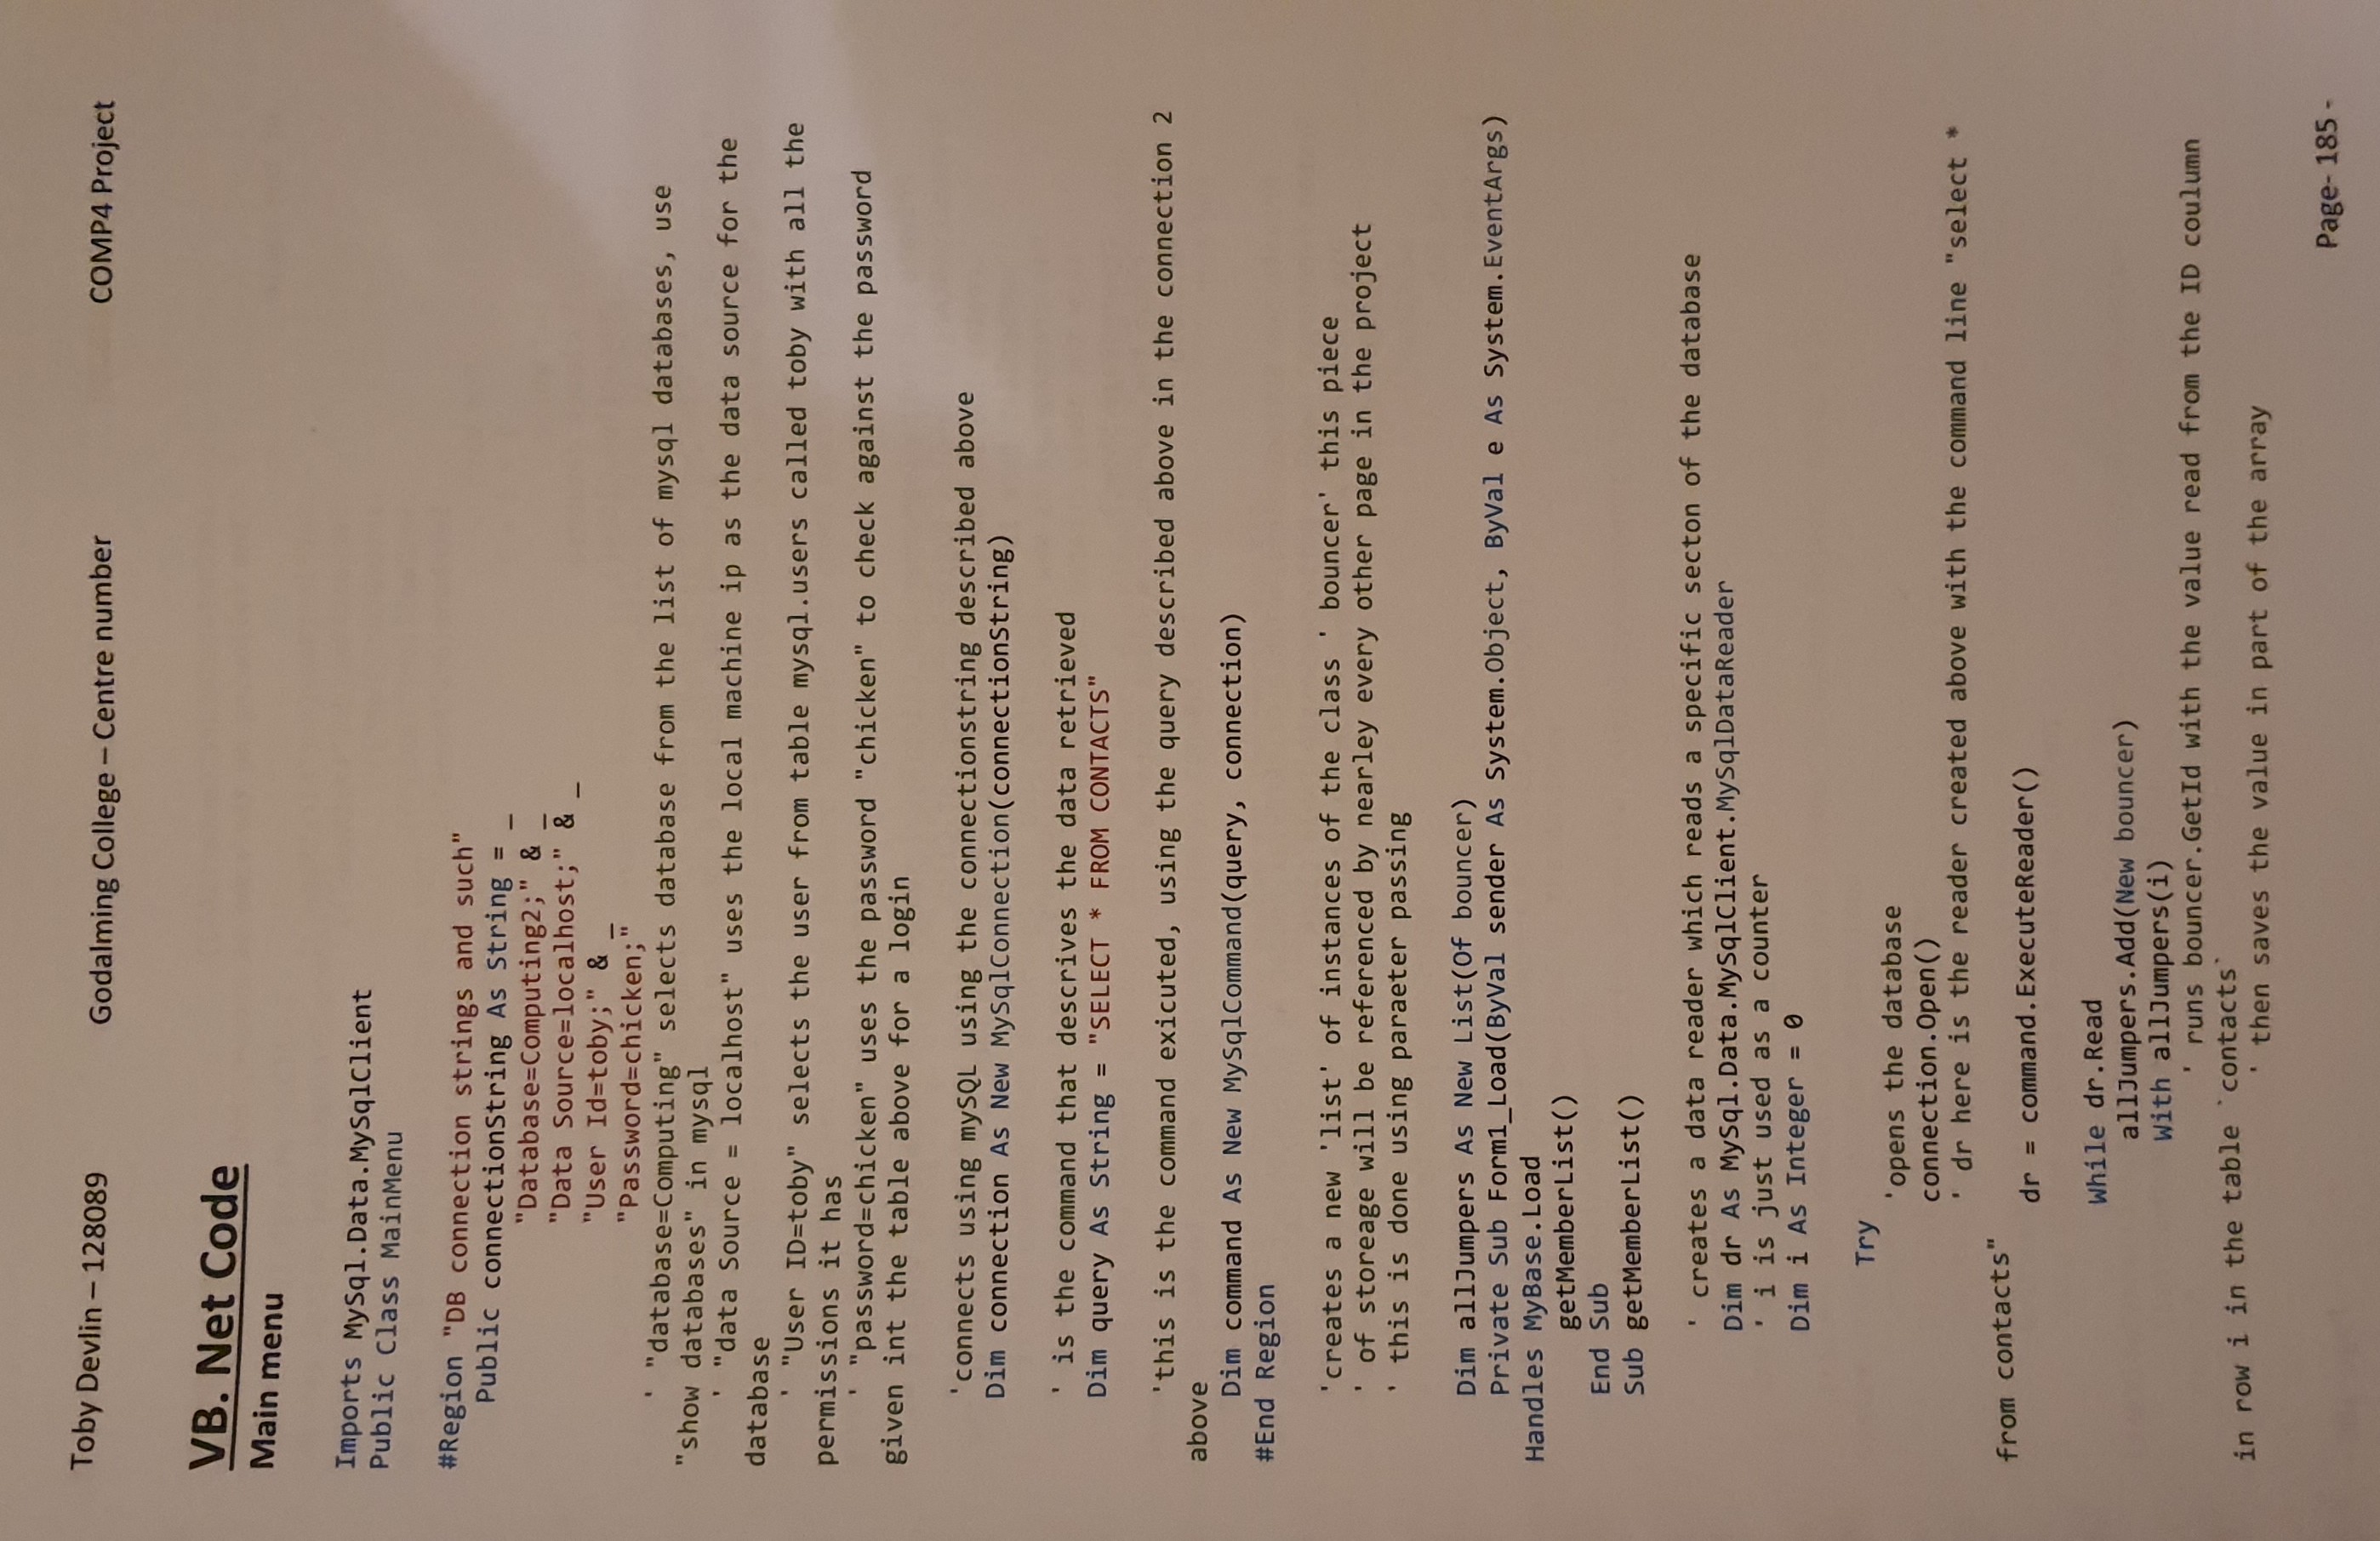
Taking a look at one of the files we can kinda see how it looks:
1 2 3 4 5 6 7 8 9 10 11 12 13 14 15 16Imports MySql.Data. MySqlClient Public Class MainMenu #Region "DB connection strings and such" Public connectionString As String = "Database=Computing2;" & - "Data Source=localhost;" & - "User Id=toby; " & "Password=chicken; " ' "database=Computing" selects database from the list of mysql databases, use "show databases" in mysql "data Source = localhost" uses the local machine ip as the data source for the database ' "User ID=toby" selects the user from table mysql.users called toby with all the ...
But from here we can update enough in order to create the actual files! We will first need to rename the images to provide a little more context - the pipeline can then do the rest. Each image is part $i$ of $n$, by naming them as such I can just merge them later on without too much fuss. After we have files its a matter of partial rewrites based off the partial VB .net code.
Moving to VB .NET
Now I have managed to convert all these images to (somewhat comprehensive) text files, the process to .NET can begin. This, however, is actually a pretty manual process after dumping all the code into 1 file. The snippet below is the aggregator for the separate files, which is then renamed to .vb extension for processing. To do this I can leverage the power of regexp, as I did in my project, to complete this!
1 2 3 4 5 6 7 8 9 10 11 12 13 14 15 16 17 18 19 20 21 22 23 24 25 26 27files = glob("out/*.txt") f_map = dict() # Group all files by their 'className' for f in files: # Funky regexp to isolate them f_key = re.search("[a-zA-Z]+[0-9]+", f).group()[:-1] if f_key in f_map.keys(): f_map[f_key] += [f] else: f_map[f_key] = [f] # dump them into code files for class_name in f_map.keys(): # get list of files txt_files = f_map[class_name] # extract and append to content content = "" for txt_f in sorted(txt_files): with open(txt_f, "r") as f: content = content + f.read() # write this out to a file with open(f"code/{class_name}.vb", "w") as f: f.write(content)
This produces a lovely set of classes I can now mess about with. After reformatting and filling in the missing characters, fixing spelling and such there's only one issue - that is that VB.NET is a windows programming language which doesn't have a solution on Linux. From here all I must do is port over to my other windows machine and start building!
Check out the repo of all the actual code here.
To be continued!